Converting images into ASCII art has been a beloved programming challenge since the early days of computing. Today, I'll explore how to create a real-time ASCII art filter using Core Image's CIKernel combined with Metal shaders, bringing this classic technique into the modern iOS development world with hardware-accelerated performance. Most of the examples you'll find online are implemented with OpenGl, which is now deprecated on Apple platforms. Instead, I'll leverage the power of Metal to achieve high-performance image processing.
Real-Time ASCII Conversion
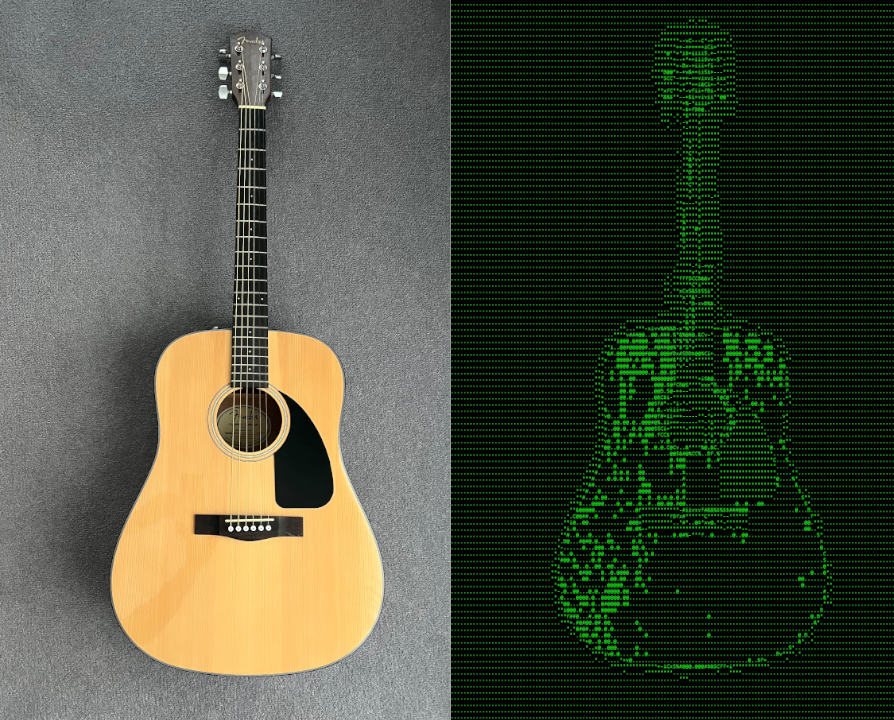
Traditional ASCII art conversion involves sampling image pixels, calculating their brightness, and mapping those values to ASCII characters with corresponding visual density. The challenge lies in doing this efficiently for real-time applications while maintaining visual quality.
I'm going to show you how to implement this using:
- CIKernel for seamless Core Image integration
- Metal shaders for GPU-accelerated processing
- Font texture sampling for character rendering
- Brightness-based character mapping for visual accuracy
Metal is Apple's low-level graphics API providing near-direct access to the GPU, enabling developers to write high-performance graphics and compute shaders. By combining Metal with Core Image's CIKernel, we can create a powerful ASCII art filter that runs efficiently on iOS and macOS devices.
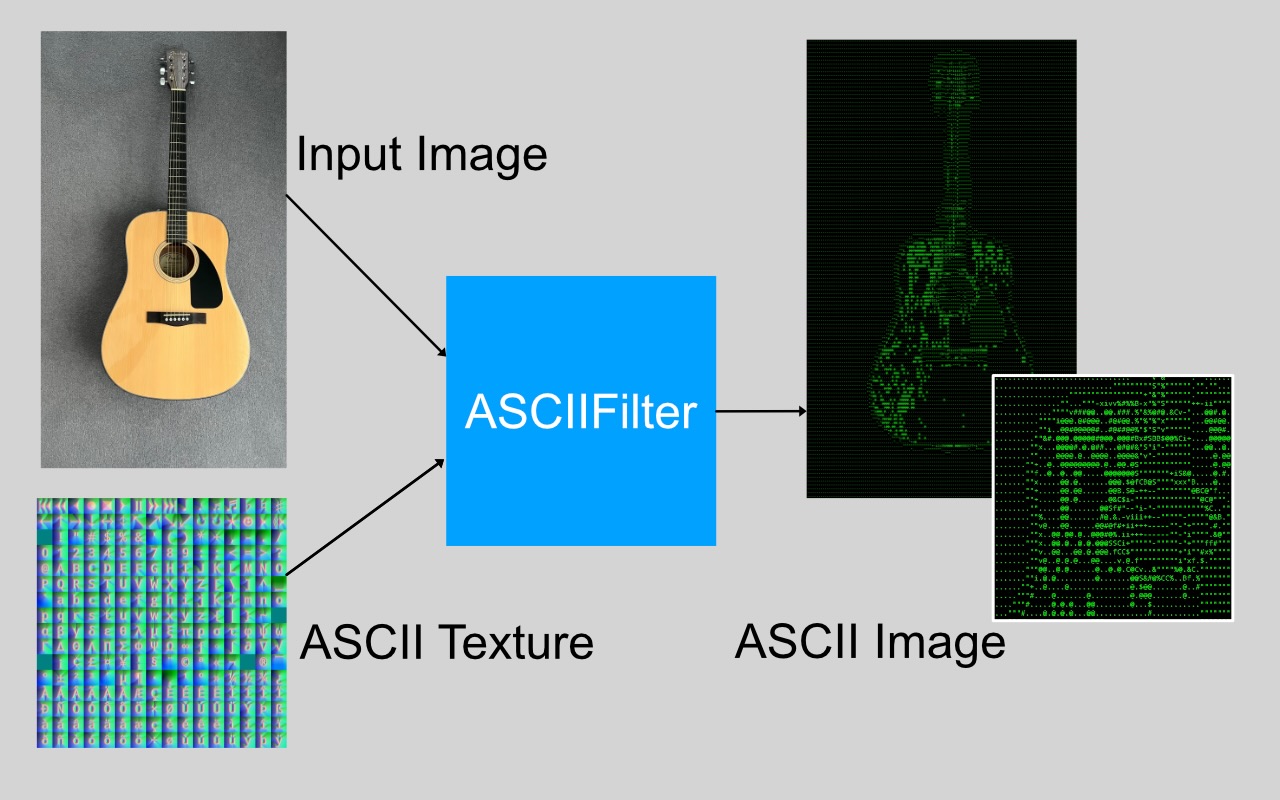
Architecture Overview
The implementation consists of three main components:
- ASCIIFilter.swift - The CIFilter wrapper that integrates with Core Image
- ASCII.metal - The C++ Metal Shader that performs the actual conversion
- ASCII-texture.png - A bitmap containing all ASCII characters for sampling
The process works by:
- Sampling the input image to determine pixel brightness
- Mapping brightness values to ASCII characters
- Sampling the font texture to render the selected characters
- Outputting the final ASCII representation
Implementation Deep Dive
The CIFilter Wrapper
import CoreImage
import UIKit

final class MetalLib {
    private static let url = Bundle.main.url(forResource: "default", withExtension: "metallib")!
    static let data = try! Data(contentsOf: url)
}

class ASCIIFilter: CIFilter {
    @objc dynamic var inputImage: CIImage?
    @objc dynamic var asciiTextureImage: CIImage?

    private let kernel: CIKernel

    override init() {
        do {
            let kernel = try CIKernel(functionName: "mainFragment", fromMetalLibraryData: MetalLib.data)
            self.kernel = kernel
            self.asciiTextureImage = CIImage(image: UIImage(resource: .asciiTexture))
        } catch {
            fatalError("Failed to create kernel: \(error)")
        }
        super.init()
    }

    required init?(coder: NSCoder) {
        fatalError("init(coder:) has not been implemented")
    }

    override var outputImage: CIImage? {
        guard let inputImage = inputImage else {
            return nil
        }

        let extent = inputImage.extent

        var arguments: [Any] = [inputImage]

        guard let texture = asciiTextureImage else { return nil }
        arguments.append(texture)
        return kernel.apply(extent: extent, roiCallback: { _, rect in return rect }, arguments: arguments)
    }
}
The ASCIIFilter class inherits from CIFilter, making it compatible with Core Image's processing pipeline.
The filter takes the inputImage and the asciiTextureImage as parameters.
The asciiTextureImage is initialised using an Asset called asciiTexture in which I stored the ASCII-texture.png file.
The Metal Shader Logic
The Metal shader implements three critical functions:
1. Character Mapping Function
static int mapColorToChar(sampler_h image, float2 S, float2 U) {
    // Define an array of ASCII characters ordered by visual density.
    const int asciiMap[] = {'.', '"', '-', '+', 'i', 'v', 'x', 'f', 'C', 'S', '&', 'B', '%', '$' , '#', '@'};

    // Get the resolution of the image being processed.
    float2 resolution = image.size();

    // Snap the coordinate to the top-right of its tile.
    float2 tileCoord = ceil(U / S) * S;

    // Normalize the tile coordinate to the image resolution.
    float2 normalizedCoord = tileCoord / resolution;

    // Sample the image at the normalized coordinate to get brightness.
    float imageSample = image.sample(normalizedCoord).r;

    // Map the brightness to an index in the ASCII character array.
    int index = ceil(15.0 * imageSample);

    // Return the corresponding ASCII character based on brightness.
    return asciiMap[index];
}
This function maps pixel brightness to ASCII characters using a carefully curated array. Characters are ordered from least dense (.) to most dense (@), creating a visual gradient that represents different brightness levels.
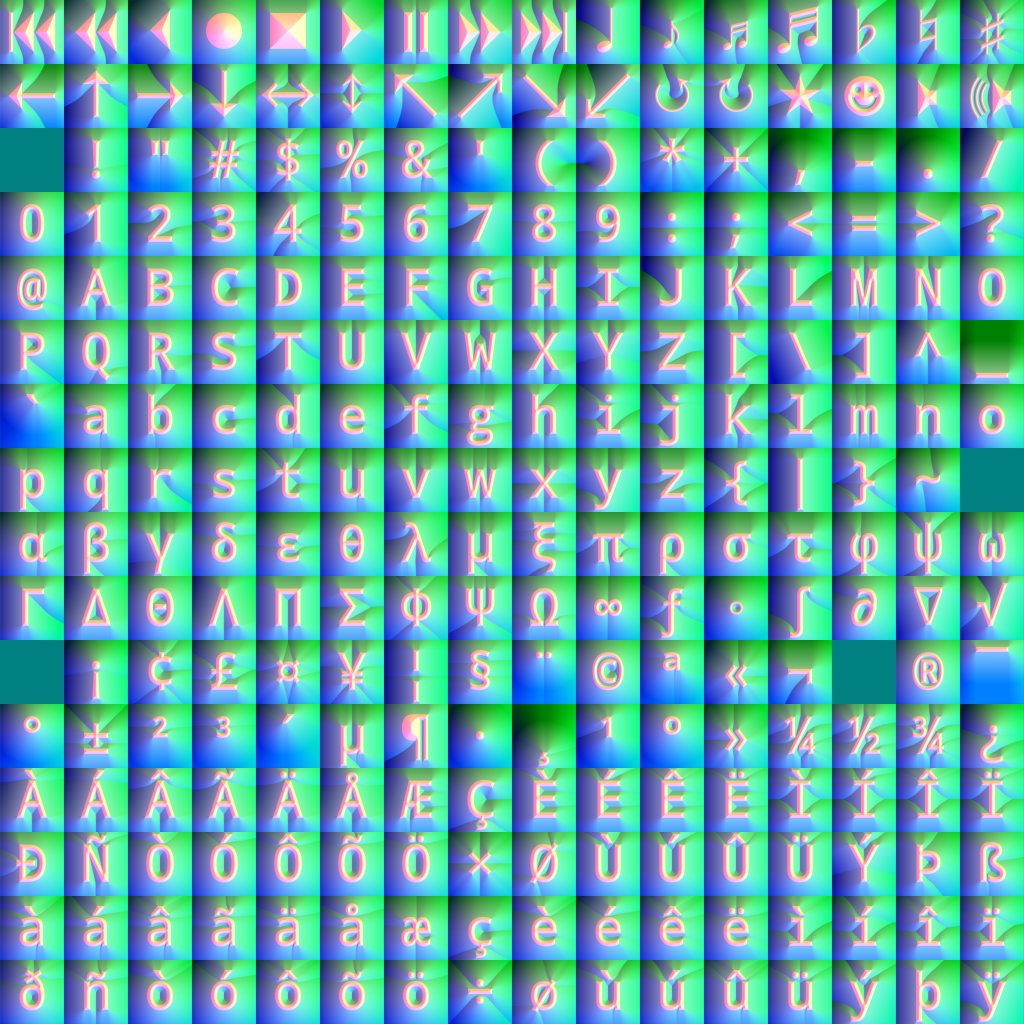
2. Font Texture Sampling
The implementation uses a texture containing a 16x16 grid of characters. Each character occupies a 16x16 pixel space but is offset by 4 pixels to the right, resulting in an effective 8x16 character size.
static float getSampleFont(sampler_h fontTexture, float2 S, float2 U, int c) {

    // Get the pixel's coordinate *within* its tile.
    float2 C = fmod(U,S)+float2(4,0);

    // Calculate the offset into the font texture based on character ID 'c'.
    float2 fontOffset = float2(c%16, c/16)*16.0;

    // Calculate the final lookup coordinate in the font texture.
    float2 fontUV = (C + fontOffset) / 256.;

    // Sample the font texture at the calculated UV coordinates.
    float redFontSample = fontTexture.sample(fontUV).r;

    // Return the final pixel value, scaled to enhance visibility.
    // The value is multiplied by 1.5 to increase contrast and visibility.
    // The result is clamped to a maximum of 1.0 to ensure it remains within valid color range.
    return fmin(redFontSample * 1.5, 1.0);
}
The font sampling function handles the complex task of:
- Calculating pixel positions within character tiles
- Mapping character IDs to texture coordinates
- Enhancing contrast for better visibility
3. Main Fragment Shader
#include <metal_stdlib>
using namespace metal;
#include <CoreImage/CoreImage.h>

extern "C" { namespace coreimage {

    /*
    static int mapColorToChar(sampler_h image, float2 S, float2 U) {
        ...
    }

    static float getSampleFont(sampler_h fontTexture, float2 S, float2 U, int c) {
        ...
    }
    */

    half4 mainFragment(sampler_h image, sampler_h fontTexture, destination dest) {

        // Get the coordinate of the current pixel in the destination image.
        float2 U = dest.coord();

        // Define the size of each character tile in the font texture.
        // The actual size of each character tile in the font texture is 16x16 pixels,
        // but we offset the sampling by 4 pixels to the right, effectively making each character 8x16.
        float2 S = float2(8.0, 16.0);

        // Get the character index based on the pixel brightness.
        int c = mapColorToChar(image, S, U);

        // Sample the font texture to get the character representation.
        float fontSample = getSampleFont(fontTexture, S, U, c);

        // Return the final color, using only the green channel for ASCII art effect.
        return half4(0.0, fontSample, 0.0, 1.0);
    }
}}
The main shader coordinates the entire process, determining which character to display and sampling the appropriate font data. Note that the output uses only the green channel, creating the distinctive monochrome ASCII art appearance.
Performance Considerations
This implementation leverages several optimizations:
- GPU Acceleration: By using Metal shaders, the entire conversion process runs on the GPU, enabling real-time performance even on large images.
- Efficient Sampling: The shader uses hardware-accelerated texture sampling, which is significantly faster than CPU-based pixel manipulation.
- Memory Efficiency: The font texture approach eliminates the need to store individual character bitmaps, reducing memory footprint.
- Parallel Processing: Metal's parallel execution model processes multiple pixels simultaneously, dramatically improving throughput.
Usage and Integration
Adding ASCII art conversion to your app is straightforward:
extension CIImage {
    func applyASCII() -> CIImage? {
        let filter = ASCIIFilter()
        filter.inputImage = self
        return filter.outputImage
    }
}

// Usage example
let originalImage = CIImage(image: yourUIImage)
let asciiImage = originalImage?.applyASCII()
This extension provides a clean, reusable interface that integrates seamlessly with existing Core Image workflows.
Conclusion
Implementing ASCII art conversion with CIKernel and Metal shaders demonstrates the power of combining traditional algorithms with modern GPU acceleration. This approach delivers real-time performance while maintaining the nostalgic charm of classic ASCII art.
This technique opens up creative possibilities for Swift developers on Apple hardware supporting Metal. The code snippets showcase best practices for Metal shader development, Core Image integration, and performance optimization.
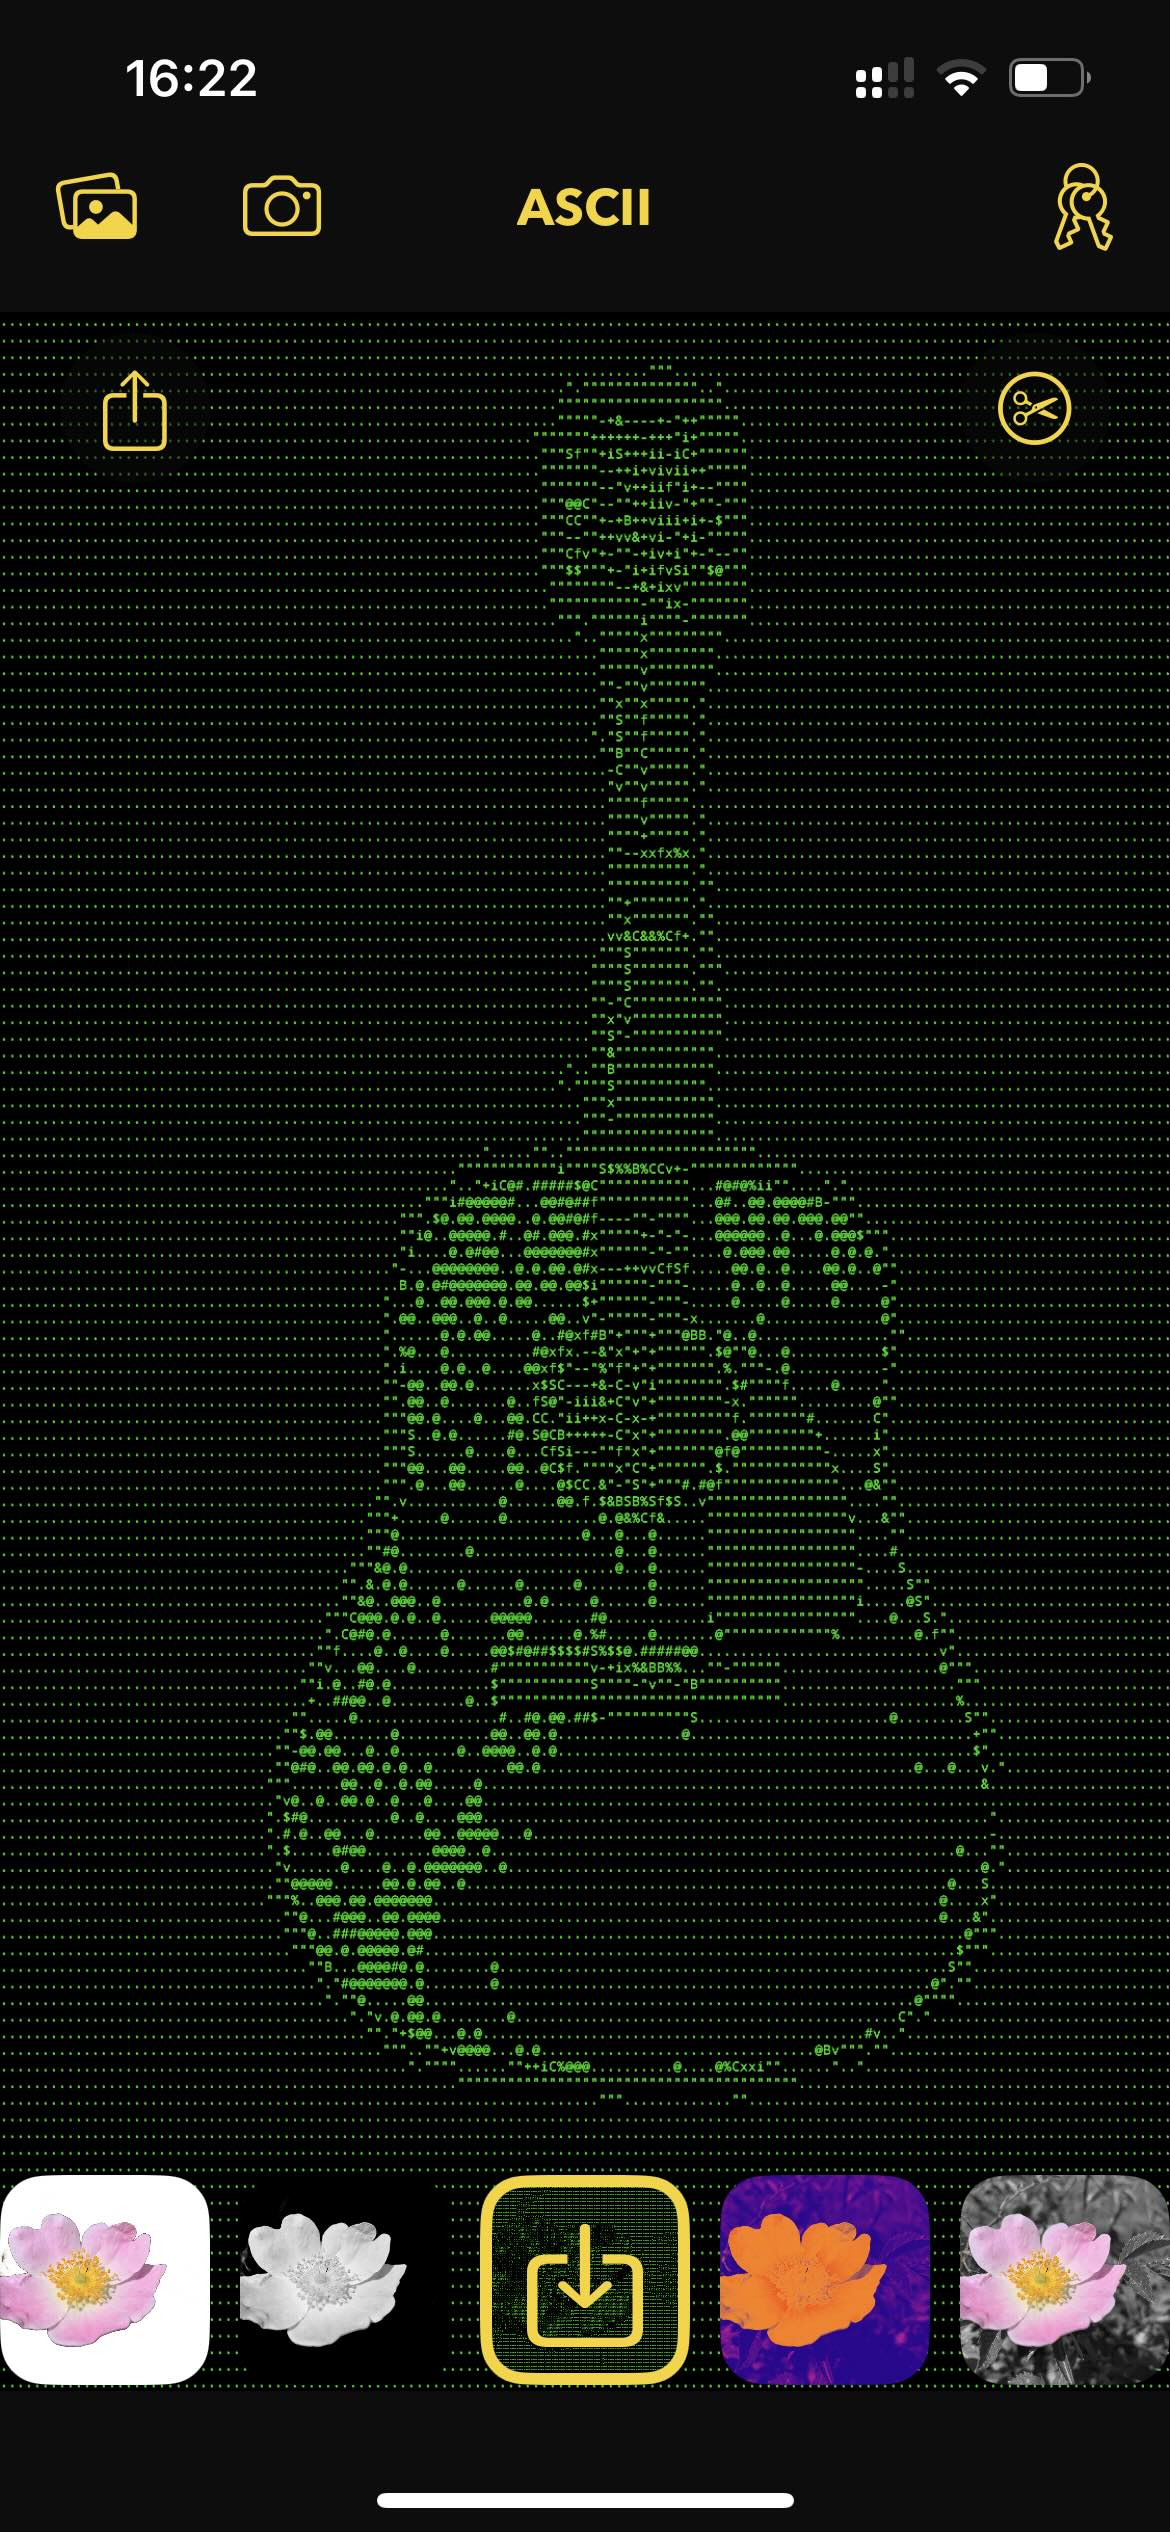
Try It Now - No Code Required! 📱
Want to experience this ASCII art effect instantly? Don't feel like diving into Metal shaders and Core Image just yet?
You can see this exact implementation in action by downloading ClippingCamera from the App Store!
It features this ASCII art filter along with other creative effects, letting you take photos in real time or transform your photos with just a tap.